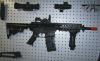
http://www.hobbytron.com/ElectricAftermathKirenexPoliceBlackBodyM4CollapsibleStockAirsoftGun.html
(Keep the giggles to a low roar, I later seen this same gun at Big5 for $99)
First off the description of the Airsoft rifle was not even close to being accurate... There are plastic gears not metal, the box says 340 FPS not 430 FPS *actual FPS was probably 250 tops and 450 RPM, Mag cap was 76 and it did not have a battery or charger *6xAA tray located in the stock* Now replaced with M4 LE stock.
Ive made quite a few cosmetic changes to this, but the most significant change has been the increased FPS and ROF.
I was a competitive RC enthusiast for a good 15+ years, still have loads of misc RC stuff and have a fairly good grasp on electric motors and timing them for different results depending on your track needs., and so it got me to tinkering with my motor and battery voltage, with amazing results thus far.
Out the box this thing would hardly dent an empty soda can at 20ft with 6 high quality rechargeable energizer aa cell's and .20 ammo.
Its taken me well over a week to get the timing right with the 10.4v battery so the motor didnt heat up and melt anything, but heres what I ended up with.
Battery: 10.4v / 3200 mah NiMH *made from matched sub aaa rc batteries*
Motor: Stock motor with endbell 24° advanced and replaced bronzite bushings with bearings.
Sealed up everything I could to prevent air leaks.
Result: 300+? FPS or more, and a fire rate that has nearly doubled, scary fast sounding now.
This thing will now shoot clean thru an empty soda can at 20ft using .12 ammo (ran out of the .20's) accuracy seems the same as when it was stock out the box., and empty the 76 round mag in a second flat *hand loading this things not my idea of a good time. The clip is unlike any I have seen online for M4's, so im not sure what to do about this yet.
ADVANCING MOTOR TIMING
Since I was in the process of timing a motor, thought I might as well share what I know. Although this is an RC motor the concept is the same.
Tools:
* small wire cutter
* split-ring pliers
* soldering iron
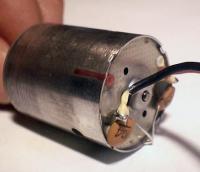
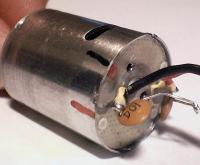
Step 1:
Mark the side of the can along the red dot - this is for your reference.
Attached Thumbnails
*
Step 2:
De-solder the capacitors from the can.
Attached Thumbnails
*

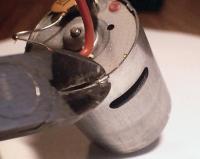
Step 3:
Pry open the 4 tabs that hold the back plate on; I find using a small wire-cutter easier than needle nose pliers, etc. Start out with opening up a little on 3 of the tabs to see if the back plate will start to rotate. Remember you aren't clipping out the tabs, just straightening them out a little.
Attached Thumbnails
*
Step 4:
With the can in one hand (a piece of rubber grip helps out) and split-ring pliers or what ever works in the other hand, rotate the backplate clockwise around 10mm. I've noticed on some batches of motor, even with all the tabs straightened, it can be difficult to rotate the plate; look for some glue gunk or maybe even excess solder from the caps - or usually a little more elbow grease does the job. Also, you don't want the plate to rotate freely.
Attached Thumbnails
*
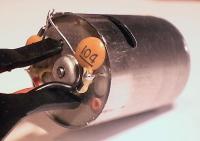
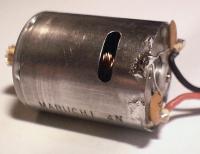
Step 5:
As a reference, see how the red dot has been rotated clockwise away from the initial position.
Attached Thumbnails
*
Step 6:
Re-solder the capacitor leads; I find that dremeling the surface a little helps the solder and all to bond nicely. I've not had a problem with backplate being too loose after timing it, but if you're not comfortable with the way it rotates, you can put a dab of CA or superglue to secure the backplate in place (makes it hard to rotate afterwards though).
Attached Thumbnails
*
Im extremely new to airsoft, so DO NOT try this on your high grade AEG's.
Ill post some video when I have time.